Investor User Manual | Platform Guide for Individual & Accredited Investors
Investor User Manual | Platform Guide for Individual & Accredited Investors
USER MANUAL FOR LIBERTUM
Asset tokenization platforms revolutionize the way assets are managed, traded, and invested by leveraging blockchain technology. This user manual provides a comprehensive guide to navigating and utilizing the platform effectively. Whether you’re a first-time user or an experienced investor, this document covers essential features, step-by-step processes, and best practices for asset tokenization, trading, and portfolio management. By following this guide, you will gain a clear understanding of the platform’s functionalities, ensuring a seamless and secure asset management experience.
Libertum Login - Investor Profile
Users can login to the Libertum Portal with their pre-defined credentials.
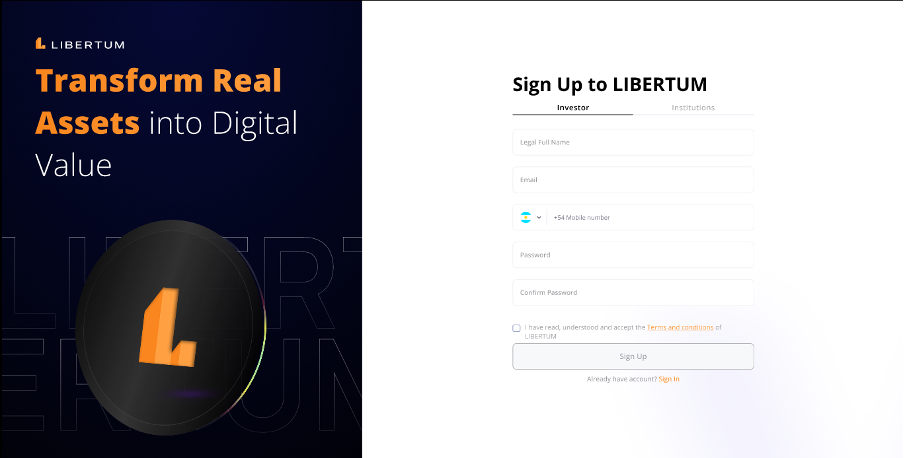
FR:001 The user must select the user type i.e., either Institution or Investor to register themselves on the platform.
FR:002 The user must enter the Full Legal Name, which must be a legal name in alphabetic only. “Eg- Javved Azam”
● The name must be alphabetical
● The name can have space
● It should not be empty
FR:003 The user must enter their email address, which must be a valid email address with a valid domain. Eg- “[email protected]”
● It can be alphanumeric
● It must have a valid domain
● It must be a valid email format
● It must not be empty
FR:004 The user must enter their phone number.
● Must include a valid country code.
● Should only accept numeric characters.
● Must match a valid phone number format.
● Should not be empty
FR:005 The password entered in the password field should meet the defined criteria as
follows:
● Minimum 8 characters.
● Must contain at least one uppercase letter, one lowercase letter, and one number.
● Should not be empty
FR:006 Confirm Password should meet the defined criteria as follows:
● Must match the “Password” field exactly.
● Should not be empty
FR:007 The user must check the “Terms and Conditions” checkbox before clicking on the “Sign-up” button
FR:008 The user must click on the “Sign-up” button once they have entered all the required information above.
● All fields must be completed and validated before form submission is allowed
FR:009 The user must click on “Sign-in” in case they already have an account on the Libertum platform
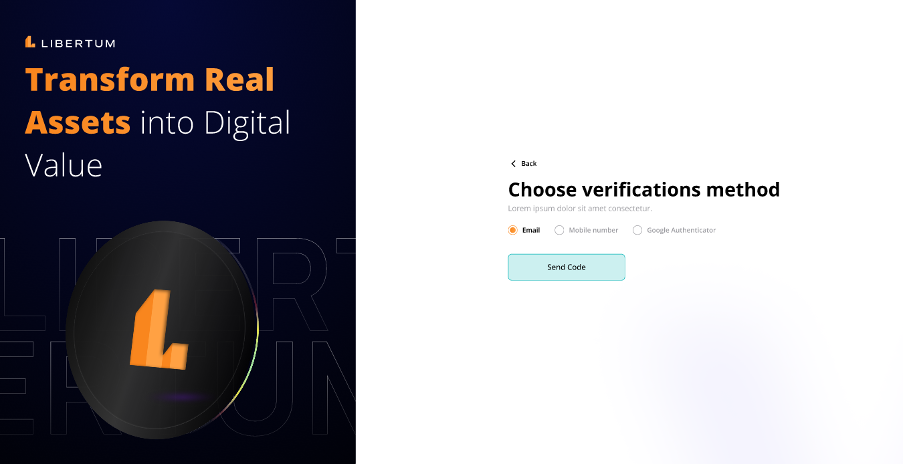
FR:010 The user can click on the “Back” button in case they wish to go back to the previous screen.
FR:011 Choose verification methods, from the three listed options available below i.e.,
● Mobile Number
● Google Authenticator
These options will be displayed as buttons on the screen.
FR:012 The user must click on “Send Code” when they wish to get the code. The following conditions will be applicable -
● The option must be pre-selected when the screen is loaded.
● Only one verification method can be selected at a time. Selecting a different option should automatically deselect the previously selected option.
● The “Send Code” button must only become active (clickable) once a verification method has been selected.
● Clicking the “Send Code” button should initiate the process of sending a verification code to the chosen method.
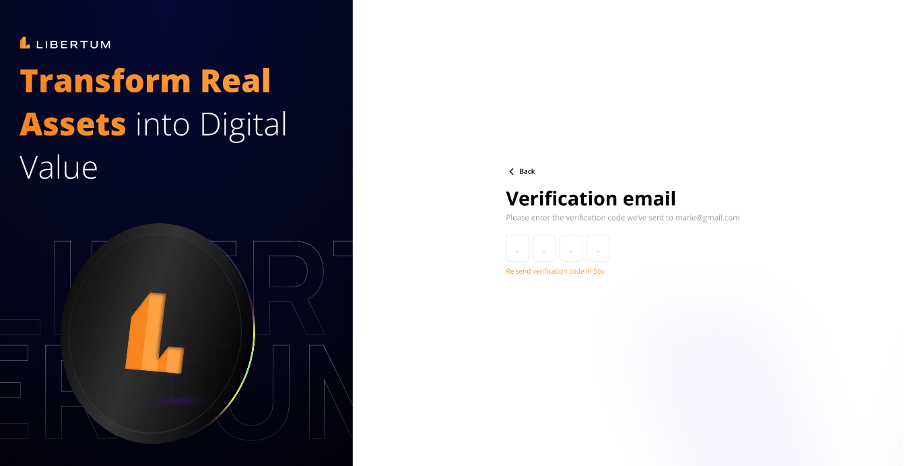
FR:013 The user can click on the “Back” button in case they wish to go back to the previous screen.
FR:014 The user must enter the 4 digit verification code, received on the email address. The following conditions applies to the verification code-
● Each field accepts only one numeric digit.
● When a digit is entered, the cursor automatically moves to the next field.
FR:015 The user must click on “Re-send verification in 60 sec” in case you have not received the OTP on the entered email address. Following criteria applies to the Resend OTP module
● The link is accompanied by a countdown timer (e.g., “Resend in 60s”) that starts when the screen is first loaded.
● The “Re-send verification code” link becomes active (clickable) once the timer reaches zero.
● Clicking the link sends a new verification code to the user’s email/mobile and resets the countdown timer.
2 Factor Authenticator
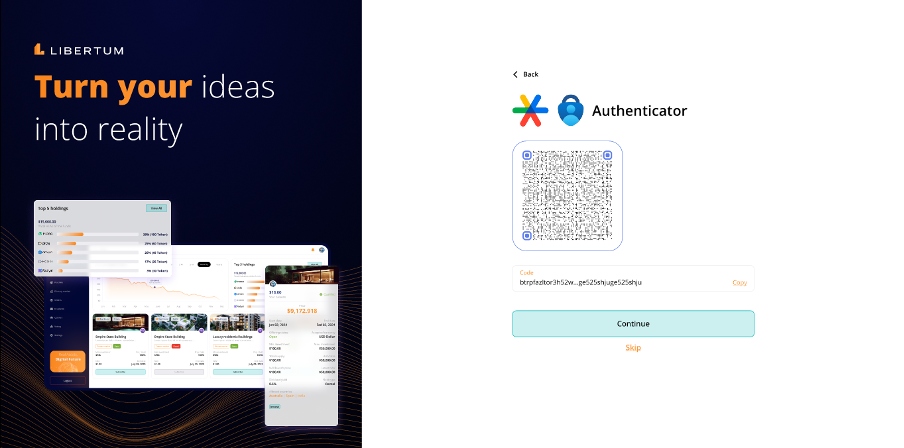
FR:016 The Investor must scan the scannable “QR code” displayed on the screen.
The QR code must be compatible with Google Authenticator and generate a time-based one-time password (TOTP) when scanned.
The page should display step-by-step instructions next to the QR code, guiding the user through:
● Downloading the Google Authenticator app.
● Signing in and accessing security settings.
● Setting up the authenticator by scanning the QR code or entering the code manually.
● Entering the verification code generated by the app.
FR:017 The Investor must click on the manual setup code that is displayed beneath the QR code. The user should be able to copy the code using a “Copy” button adjacent to it.
● A field should be provided for the user to enter the verification code generated by Google Authenticator.
FR:018 The Super admin should click on the “Continue” button to continue the authentication. The “Continue” button should remain disabled until a valid code is entered.

FR:019 The Investor should enter the 4 digit “verification code”.
FR:020 The Investor must click on the “Re send verification code in 60 sec” to receive the verification code again.
● Upon entering the correct verification code, the system should validate the code and allow the user to proceed to the next step.
● If the code is incorrect or expired, an error message should be displayed, prompting the user to try again
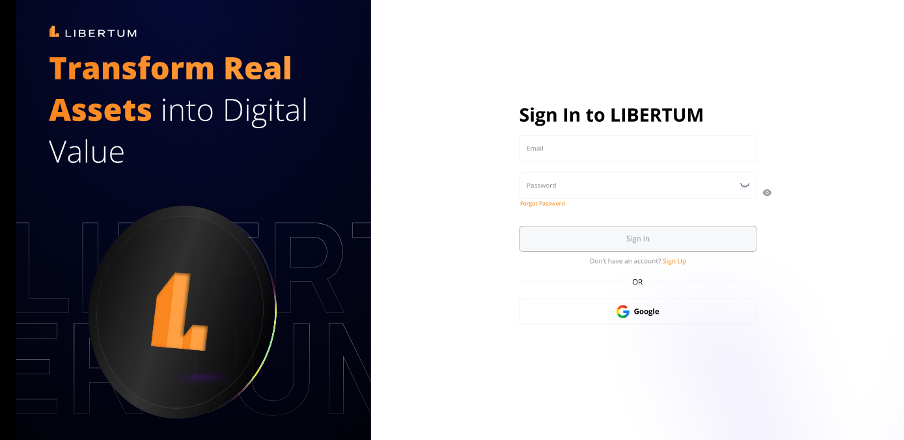
FR:021 The Investor must enter either their registered email address or Phone number to Sign-in to the Libertum platform. This field will follow the following guidelines-
● The entered phone number or email address must match with one of the entry in the database
● The field should not be empty
FR:022 The Investor must enter the password that was created at the time of Signing-up. This field will follow the following guidelines-
● The entered password must match with the password created at the time of Sign-up
● The field should not be empty
FR:023 The Investor must click on the “Sign-in” button to sign in the Libertum platform post entering all the details in the requested fields.
FR:024 The Investor must click on the “Forget Password” in case they forget the password they have created at the time of registration.
FR:025 The Investor should click on the “Sign up” button in case they do not have an account on the Libertum platform and wish to register themselves.
FR:026 The Investor must click on the “Google” button to sign up using the Social id.
Forget Password
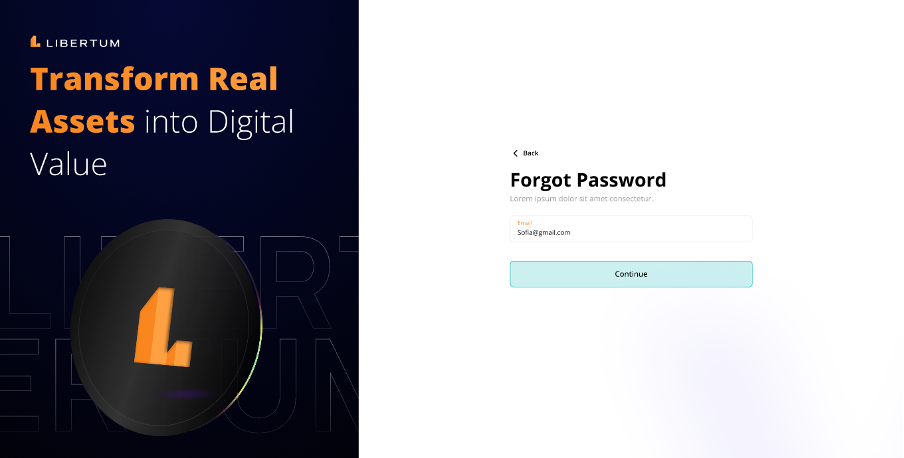
FR:027 To change the password, the Investor must enter their registered email address.
● The email address must be the same as used at the time of registration
● The field should be empty
FR:028 The Investor must click on the “Continue” button post entering the email address.

FR:029 The user must enter the 4 digit Verification code received on their registered email address.
FR:030 The user must click on the “Re-sent verification code in 60 sec” to receive the code again in case they have not received it for the first time.
FR:031 The user must enter a new password.The password entered in the password field should meet the defined criteria as
follows:
● Minimum 8 characters.
● Must contain at least one uppercase letter, one lowercase letter, and one number.
● Should not be empty
FR:032 Confirm Password should meet the defined criteria as follows:
● Must match the “Password” field exactly.
● Should not be empty
FR:033 The user must click on the “Submit” button to submit the password change request with the new password details.
Upon clicking “Continue,” the system should verify the email address and send a password reset link to the provided email if it is valid and associated with an account.
Then the user will receive an option to change the password and confirm the new password
After the user sets the password, then the user will be redirected to the login page
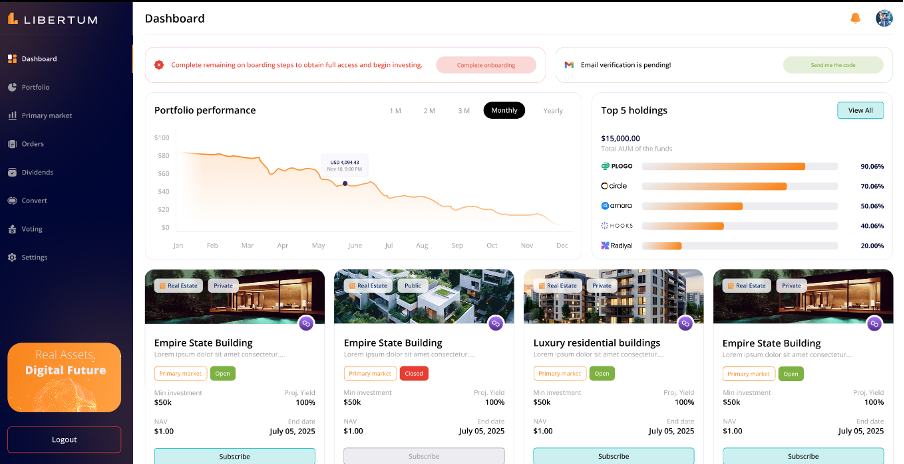
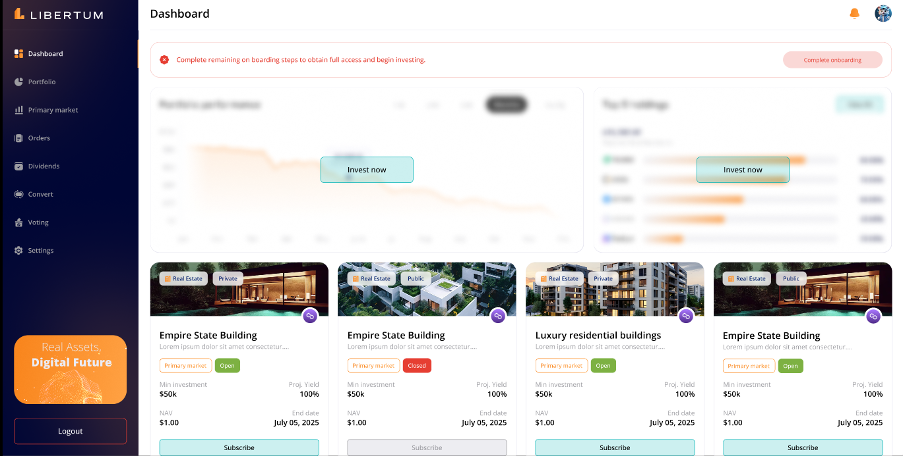
FR:034 The user must click on the “Complete Onboarding” process to complete the KYC of the user to get access to the platform and enable trading/investment on the platform.
FR:035 The user must click on the “Send me the code” to complete the verification process for the mobile number.
FR:036 The user must click on the “Dashboard” to access the information specific to the user of the platform.
The left panel depicts the list of tabs that a user can access while being on the platform post they have completed the KYC process.
FR:037 The user can click on the “Logout” button to log them out of the platform
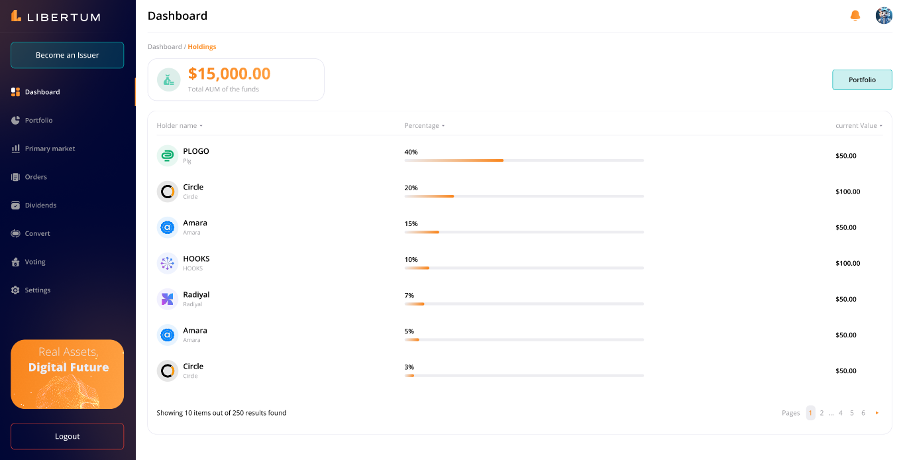
FR:038 The Portfolio Performance depicts the performance of the portfolio that a particular investor owns. It will be enabled post KYC is completed and the Investor has invested in one or more holdings.
FR:039 The “Top 5 Holdings” depicts the $ value of a particular user’s top 5 holdings. It will be enabled post KYC is completed and the Investor has invested in one or more holdings.
FR:040 The user must click on the “View All” to view the exhaustive list of all the holdings.
Email Verification
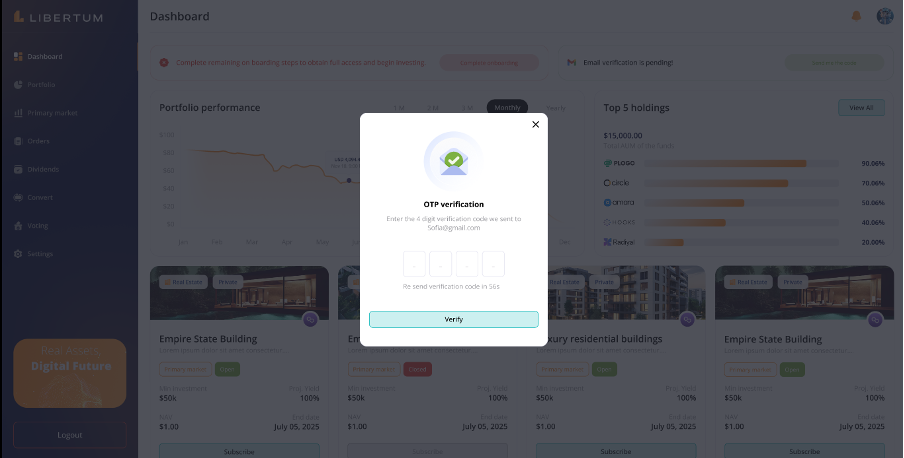
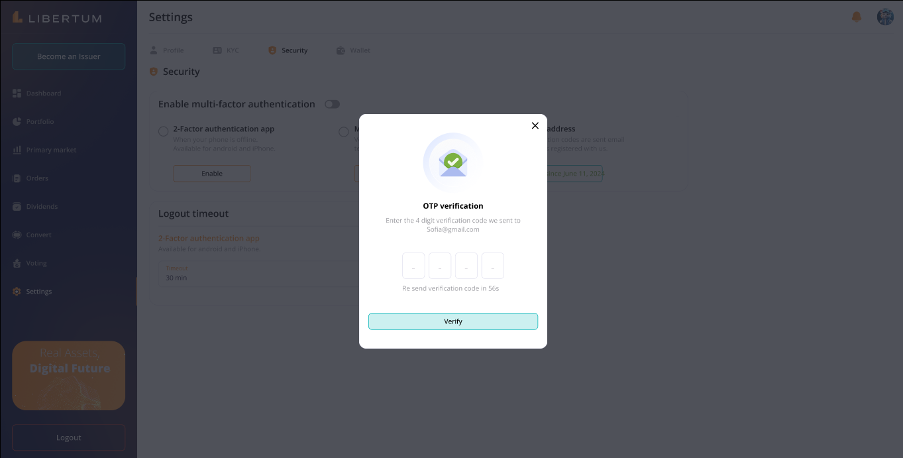
FR:041 The Investor must verify the email address or phone number by entering the 4 digit phone number received on the respective mode for verification.
FR:042 The Investor must click on the “Re-sent verification code in 60 sec” to resend the OTP to the respective verification mode.
FR:043 The Investor must click on the “Verify” button to verify the email address.
● The 4 digit code has to be entered one after another.
The Verify button will be enabled after entering the verification code
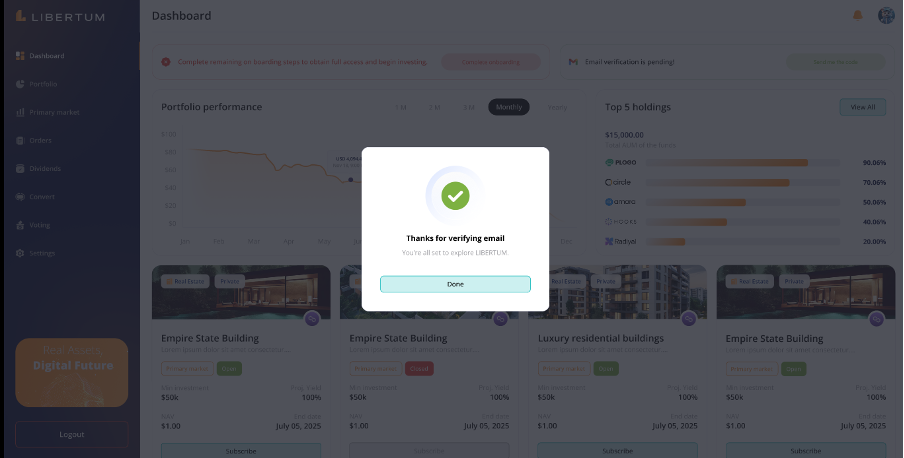
FR:044 The Investor must click on the “Done” button to confirm the verification and move to the Dashboard screen.
The above Dashboard screen will be visible to the Investor.
** KYC**
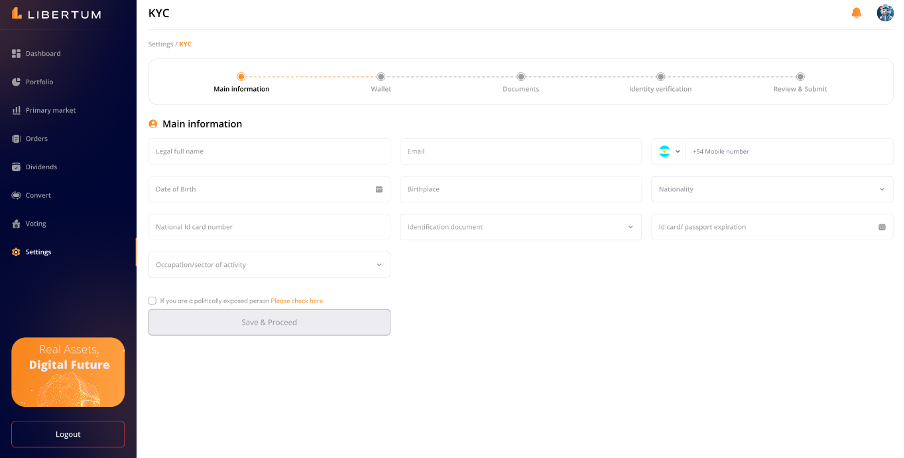
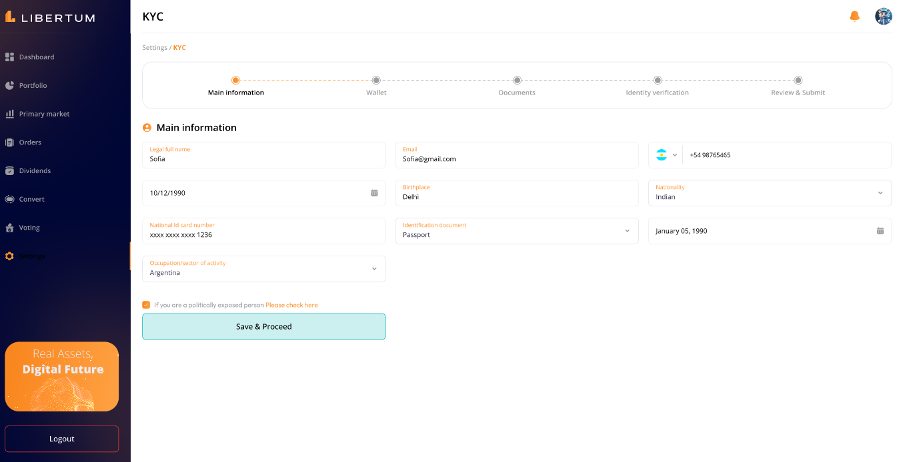
FR:045 The shown bar displays the progress of a particular individual in terms of the KYC progress. It moves as the user keeps on progressing.
FR:046 The Legal Full field Name will display the name entered by the user at the time of the registration.
FR:047 The Email id field will display the name entered by the user at the time of the registration.
FR:048 The phone number field will display the phone number entered by the user at the time of the registration.
FR:049 The user must enter their Date of Birth using the date picker in the “Date of Birth field”
FR:050 The Investor must enter their Birthplace in the “Birthplace” field. The field must follow below mentioned criterias-
● The field must be alphabetics
● The field can not be empty
FR:051 The Investor must enter their Nationality from the drop down list in the “Nationality” field.
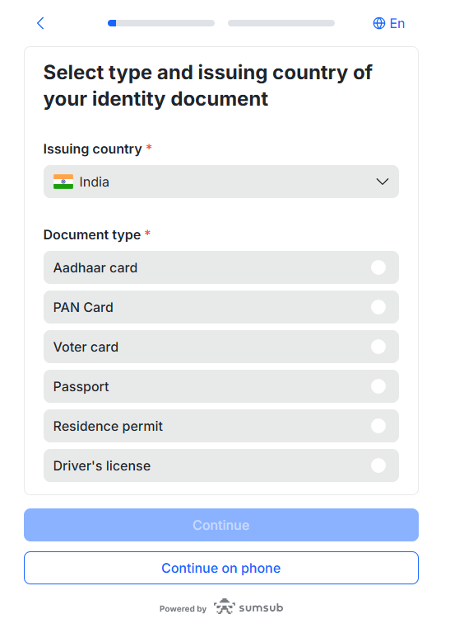
FR:052 The Investor must select the Identification document from the drop down list which they will be using to verify their identity. The list of the documents include-
● Passport
● Driving License
● Other ID
FR:053 The Investor must enter the National ID Card Number. The field must follow below mentioned criterias-
● The field must be alphanumeric
● The field can not be empty
FR:054 The user must enter the expiry date of the Id or the Passport using the date picker.
FR:055 The user must enter the Occupation/ Sector of Activity.The field must follow below mentioned criteria
● The field must be alphabetics
● The field can not be empty
FR:056 The user must click on “Save & Proceed” once they have entered data in all the fields.
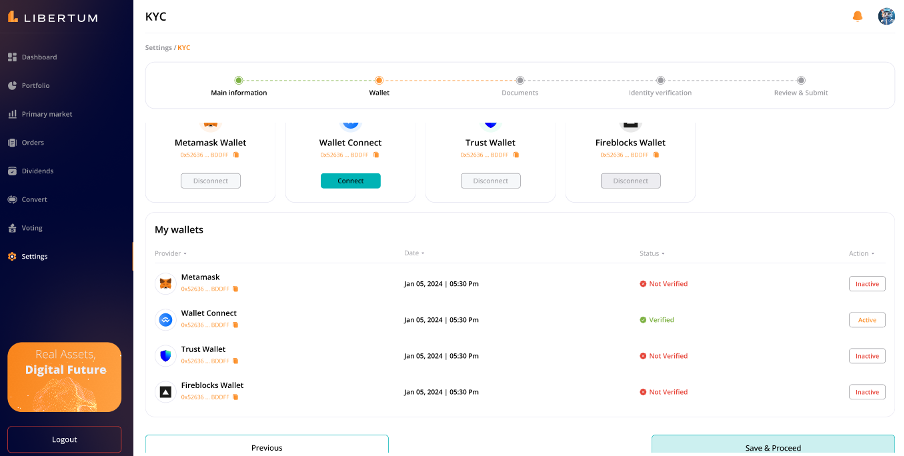
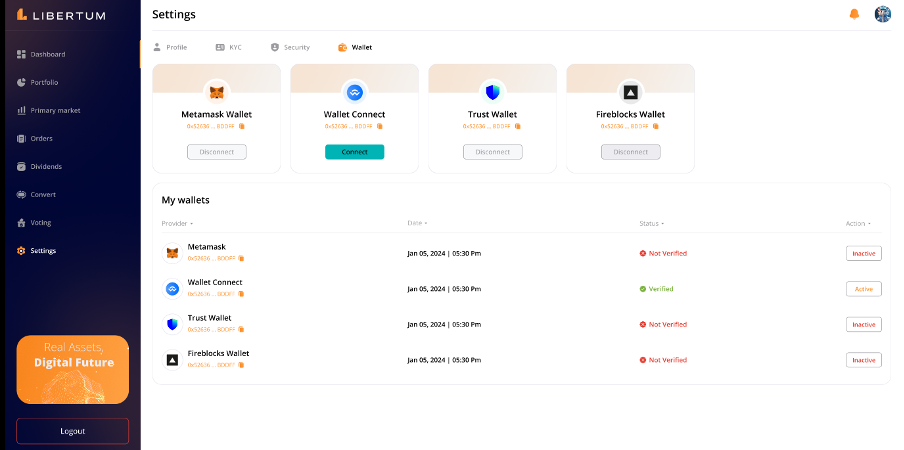
FR:057 The user must click on the “Wallet Connect” to connect their Wallet on the Libertum Platform from the Wallet 3 Modal option.
● The user will be redirected to the various options available in the Wallet Connect option and from there they can select the desired wallet for connection.
● Each wallet option should display the wallet’s name, a representative icon, the wallet address, and the type of blockchain or network it supports.
● The user should see a “Connect” button for wallets that are not yet connected, and a “Disconnect” button for wallets that are already connected.
FR:058 The user must click on the “Metamask Connect” to connect their Metamask Wallet on the Libertum Platform
FR:059 The user can view the connected wallet status from the “My Wallets” sections. The “My wallets” section should list all the wallets the user has connected, including:
● Provider: The name of the wallet provider (e.g., Metamask, Wallet Connect).
● Date: The date and time when the wallet was connected & created
● Status: A status indicator showing whether the wallet is Verified or Unverified
● Action: An “Active” button indicates that the wallet is currently in use.
Only one wallet can be active at a time. If a user has multiple wallets under “My Wallets” and activates a different wallet, the previously active wallet will automatically become inactive.
FR:060 The user must click on the “Trust Wallet” to connect their Trust Wallet on the Libertum Platform
FR:061 The user must click on the “Fireblocks Wallet” to connect their Fireblocks Wallet on the Libertum Platform
FR:062 The user must click on “Previous” in case they wish to go back to the previous screen.
FR:063 The user must click on “Save & Proceed” once they have entered data in all the fields.
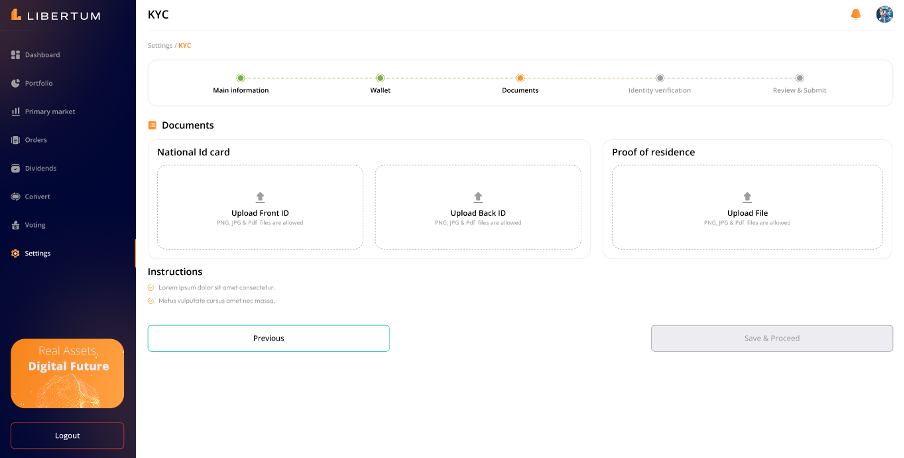
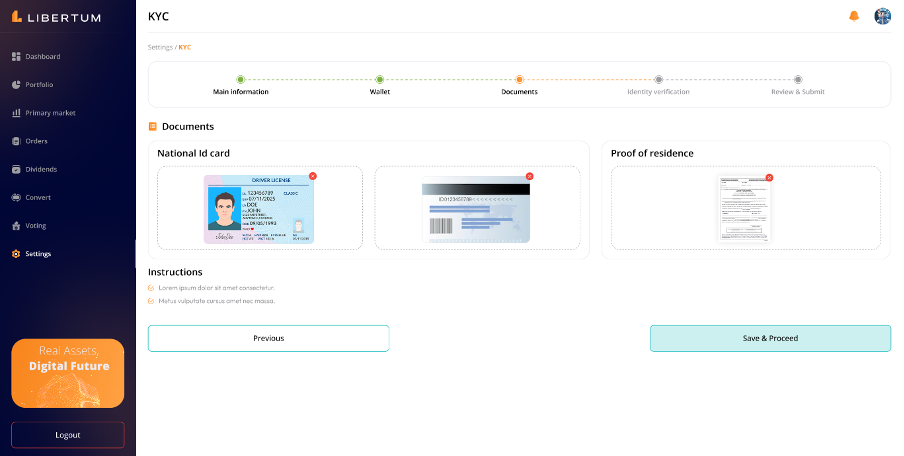
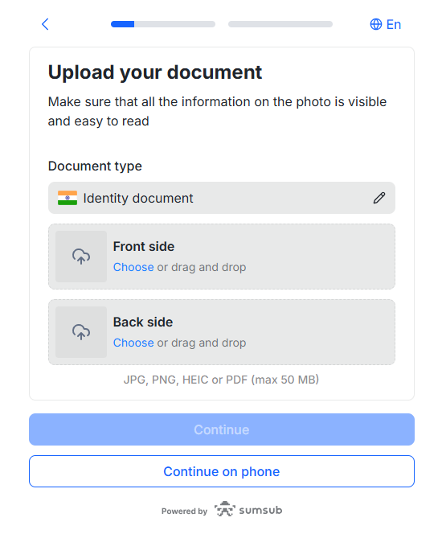
FR:064 This section denotes the “National ID Cards” section, there are two upload slots:
Upload Front ID: For uploading the front side of the National ID card.
Upload Back ID: For uploading the back side of the National ID card.
FR:065 The user must click on the “Upload Front ID” button to upload the front section of the ID they selected at the previous step. The user must ensure that Front ID upload should be in file formats like PNG, JPEG, PDF and a maximum file size of 5 MB.
FR:066 The user must click on the “Upload Back ID” button to upload the front section of the ID they selected at the previous step. The user must ensure that Back ID upload should be in file formats like PNG, JPEG, PDF and a maximum file size of 5 MB.
FR:067 This section denotes the “Proof of Residence” section.
FR:068 The user must click on the “Upload File” button to upload the proof of residence that they selected at the previous step. The user must ensure that uploaded documents should be in file formats like PNG, JPEG, PDF and a maximum file size of 5 MB.
FR:069 The user must click on “Previous” in case they wish to go back to the previous screen.
FR:070 The user must click on “Save & Proceed” once they have entered data in all the fields.

FR:071 The user must click on “Complete your KYC” to enable the KYC with 3rd Party. On clicking on “Complete your KYC” they will see a Sumsub page being displayed which will eventually guide them on step-by-step instructions on KYC completion.
FR:072 The user must click on “Previous” in case they wish to go back to the previous screen.
FR:073 The user must click on “Save & Proceed” once they have completed the KYC with a third party i.e., SumSub. The button remains inactive until the KYC is completed.
Following steps need to be completed for completing the KYC with SumSub.
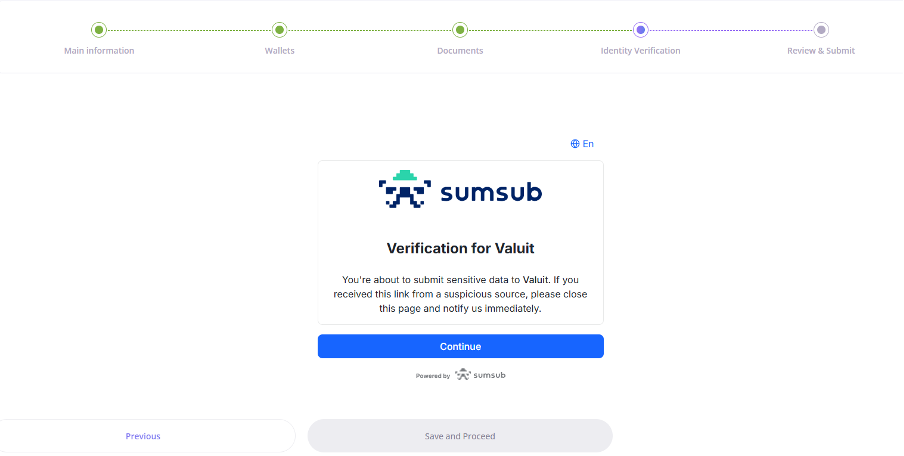
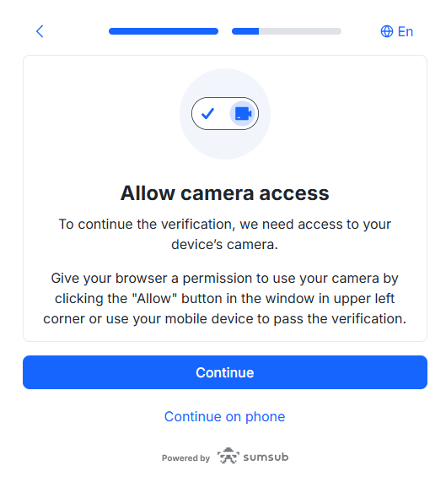
FR:001 The user must click on “Continue” to complete the KYC with Sumsub. On clicking the “Continue” button they will be directed to the next step to complete the KYC with Sumsub.
FR:002 The user must click on “Previous” in case they wish to go back to the previous screen.
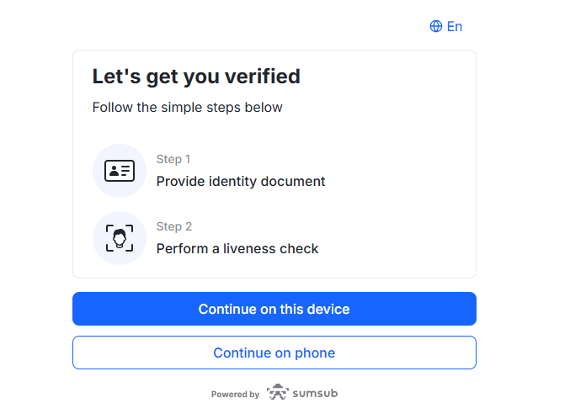
FR:003 The user must click on “Continue on this device” in order to continue the KYC process on their current screen.
FR:004 The user must click on “Continue on phone” in case they wish to continue the KYC process on their phone
FR:005 The user must click on “En” next to the globe sign to switch to a different language. They can select the desired language from the drop down menu to continue the KYC process.
In case the user clicks on “Continue on this device’ then the following steps will follow on their current device.
Following screens will be displayed and the user can follow them to complete the KYC process.

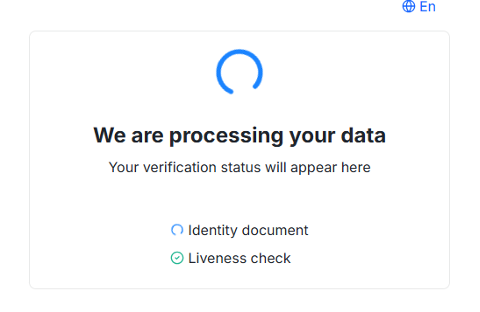
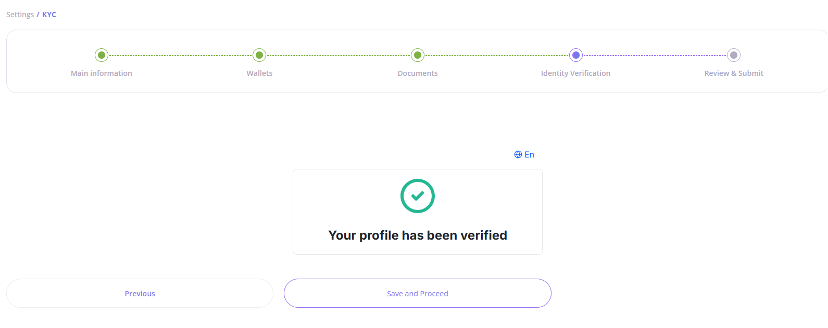
FR:006 Once the KYC with Sumsub is completed the user will be able to click on the “Save and Proceed” button. The button will be activated post the profile has been verified.

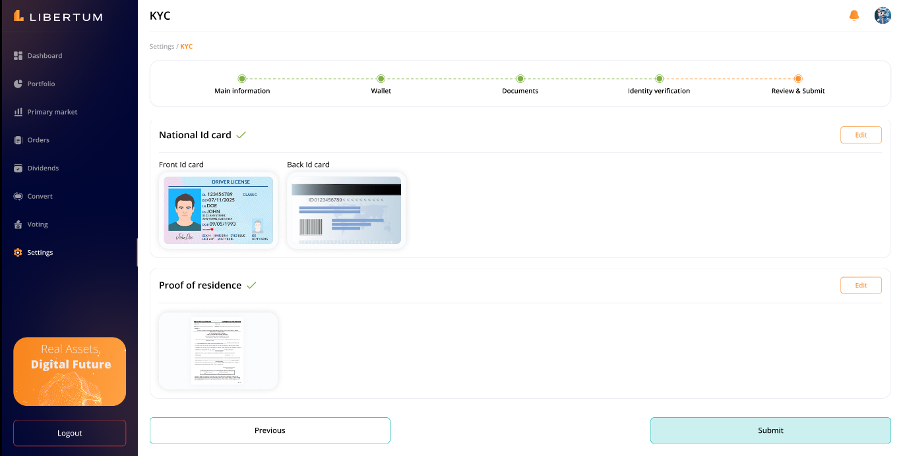
The above page is the “Review and Submit” section where users can review or edit the information they’ve provided at each step. If they wish to make changes, they can click on “Edit Section” to be redirected to the relevant section
FR:074 The user must click on the “Edit” button in case they wish to make changes to any of the information provided by them in the previous sections.
FR:075 The user must click on “Previous” in case they wish to go back to the previous screen.
FR:076 The user must click on “Save & Proceed” once they are satisfied with the information provided by them in the previous steps.
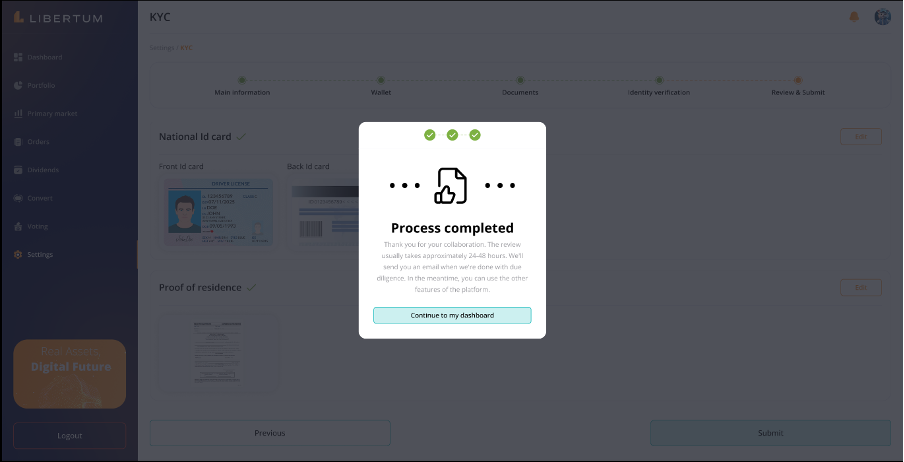
FR:077 The user must click on “Continue to Dashboard” once they have successfully completed their KYC. Following screen will be visible.
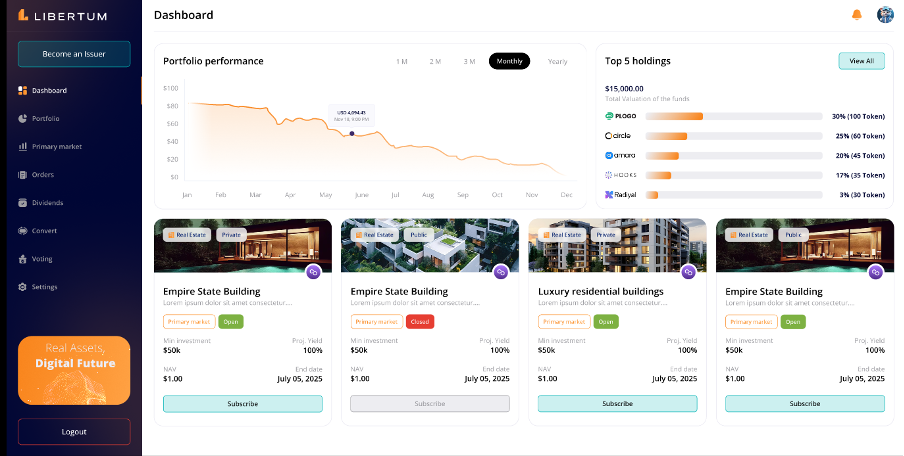
FR:078 The user must click on the particular icon of each listing to know about it on the Primary marketplace. It will be enabled post KYC is completed and the Investor has invested in one or more holdings.
Portfolio

“Portfolio” section displays the list of all tokens in their portfolio with details such as:
● Token Name & Wallet ID: Displays the name of the token (e.g., ABC Token) and a partial view of the associated wallet address.
● NAV (Net Asset Value): Shows the per-unit value of each token.
● Invested Value: The amount the user invested in each token.
● Current Value: The current market value of the user’s holdings for each token.
● Total Gain/Loss: Displays the total percentage change in the value of the user’s investment since they purchased the token.It shows tokens gain/loss.
● Blocked/Unblocked: Indicates whether the tokens are free to be traded or if they are blocked. The icons show both a locked (red) and an unlocked (green) status with values that could represent the number of tokens or their equivalent value.
● Status: Indicates the trading status of the token (e.g., Open or Closed).
● Action: Provides buttons for user actions such as “Buy,” “Sell,” and “Transfer.”
● If an action button is not visible it means that option is not available.
FR:079 The user must click on the “Search Bar” to search a particular Token by “Token Name” or by “Token Address”
FR:080 The Investor must click on the “Export CSV” to export the list of all the tokens created on the platform in CSV format for offline record-keeping or further analysis.
FR:081 The user must click on “Wallet Address” available under the Token Name for each token, which will redirect you to the Token transaction available on the scan.
Buy
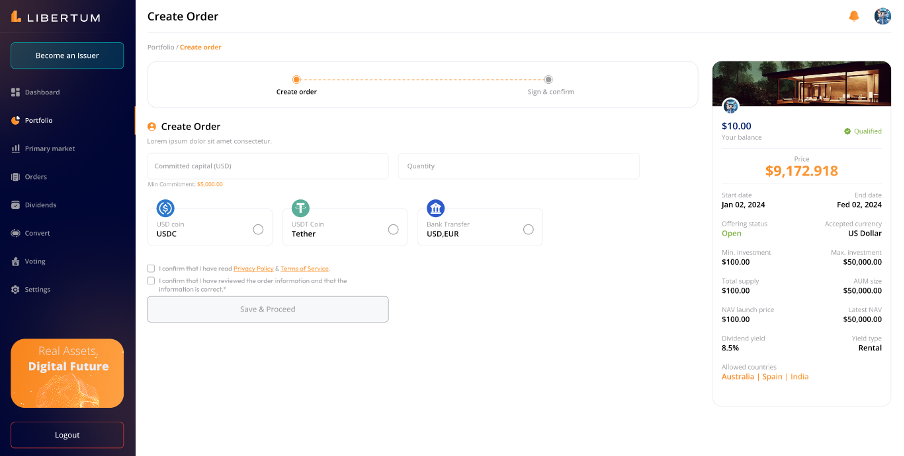
FR:082 The user must click on “Buy” to purchase additional units of the selected token and redirect them to the “Create Order” section.

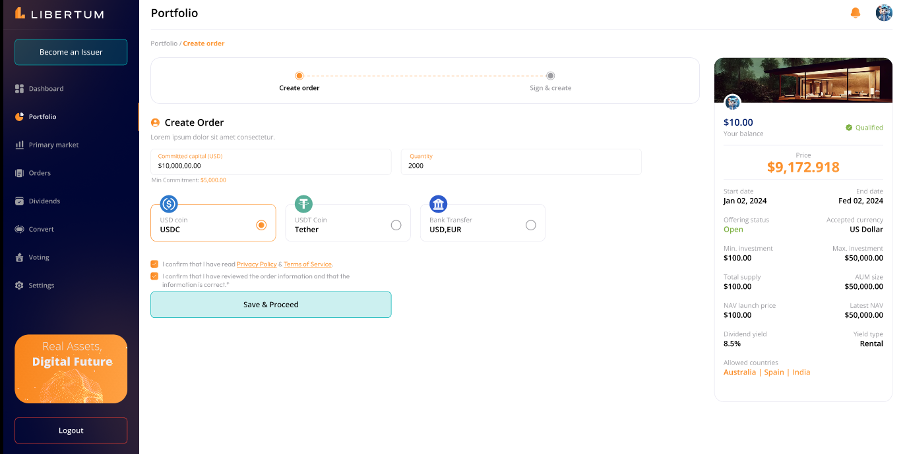
FR:083 The investor must enter the capital amount they wish to commit for the offering in the “Committed Capital (USD)” field.
FR:084 The investor must enter the Quantity they wish to create an order for in the “Quantity” field.
FR:085 The investor must check the box for the currency they wish to invest in.
FR:086 The investor must “tick” the checkboxes’ available above the “Save & Proceed” button before proceeding further.

Once the investor has successfully moved to the next step by clicking the “Save & Proceed” button, they will be redirected to the next step i.e., Sign & Create.

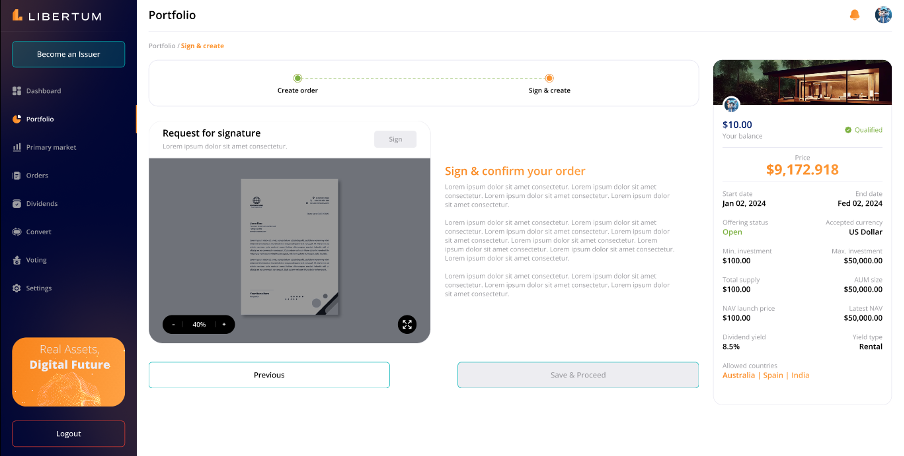
FR:087 The investor must click on the “Sign” button to open the “Purchase Agreement” where they are supposed to sign the document.
FR:088 The investor must click on the “Previous” button to go back to the previous page.
FR:089 The investor must click on the “Save & Proceed” to move to the next step.
The button will be enabled post the investor has successfully signed the Purchase Agreement.
On clicking on the “Save & Proceed” the investor will be redirected to a pop-up modal where they will see the Preview of the order created displaying the following information -
● Pay with
● Fee
● Total
FR:090 The investor must click on the “Invest” button to confirm and proceed further.

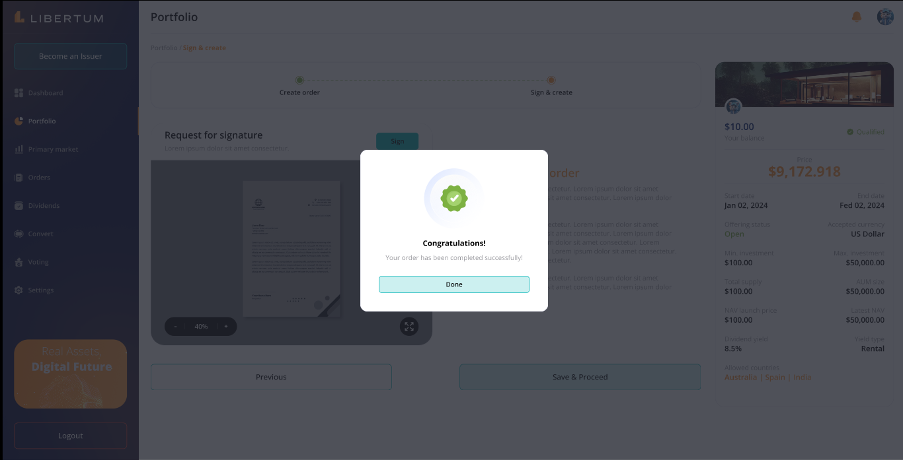
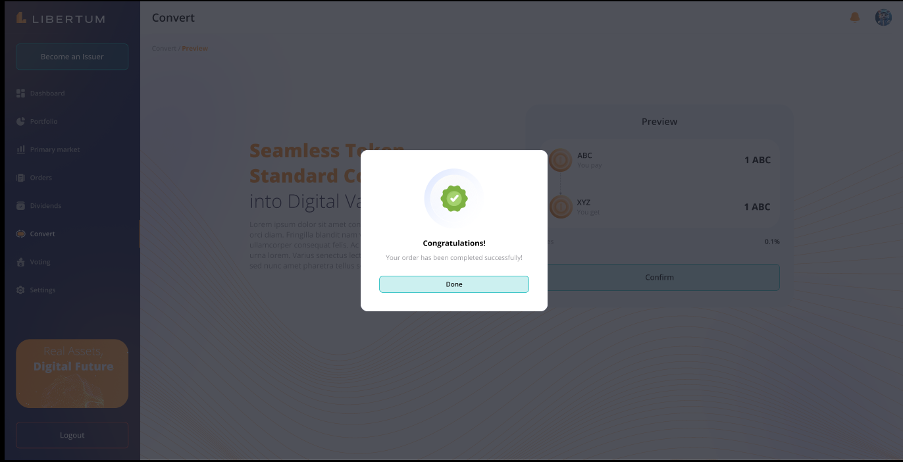
Once the investor clicks on the “Invest” button a pop-up will appear confirming that the order has been completed successfully.

FR:091 The investor must click on “Done” to close the Pop-up modal and will be redirected to the Orders tab to view all the orders including the one just created.
Sell
Sell option would enable the user to sell some or all of their holdings in the selected token.
FR:092 The investor must click on the “Sell” button to sell the tokens they possess on the platform.
On clicking on “Sell” a screen will appear, where they must enter the following information-
● Tokens to redeem
● Price per Token
● Expected Payment
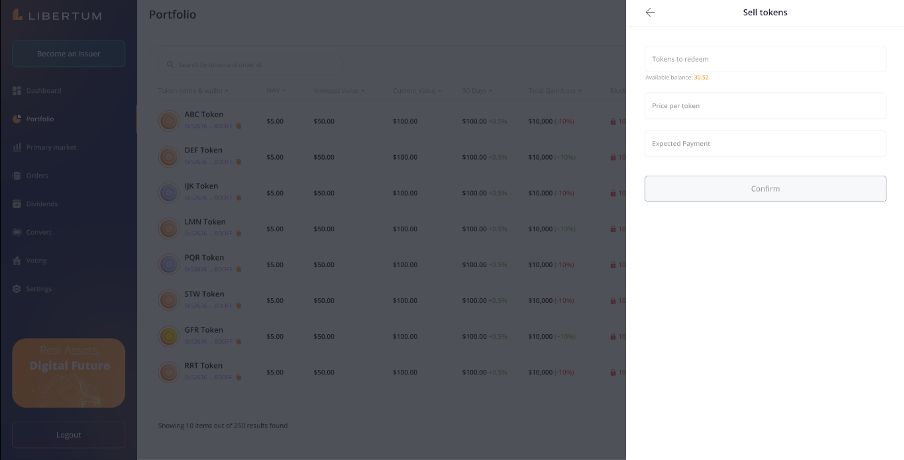
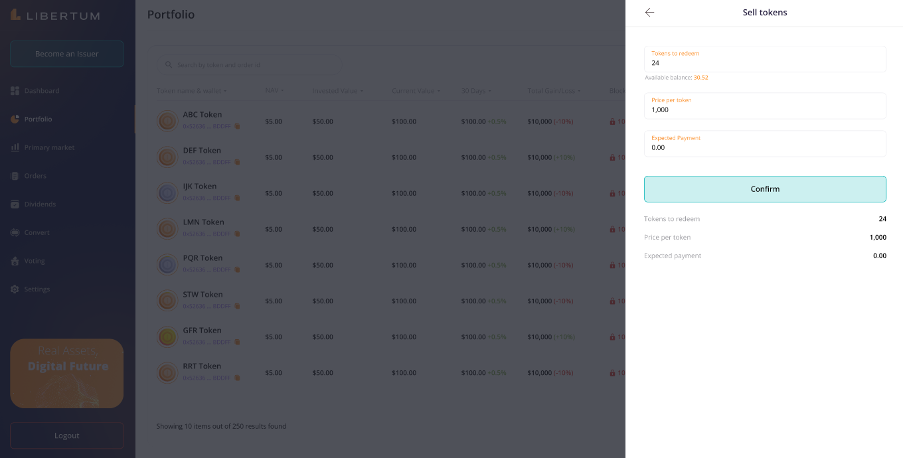
FR:093 The investor must click on the “Confirm” button to make the transaction successful.
After entering the above information the confirm button will become active and the investor will be able to click on it.
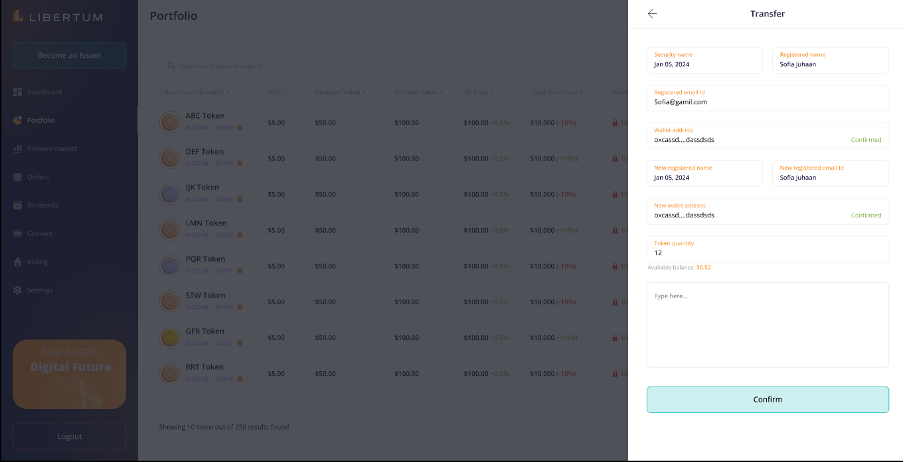
Transfer
FR:094 The user must click on “Transfer” in case they wish to transfer the token to a different user.
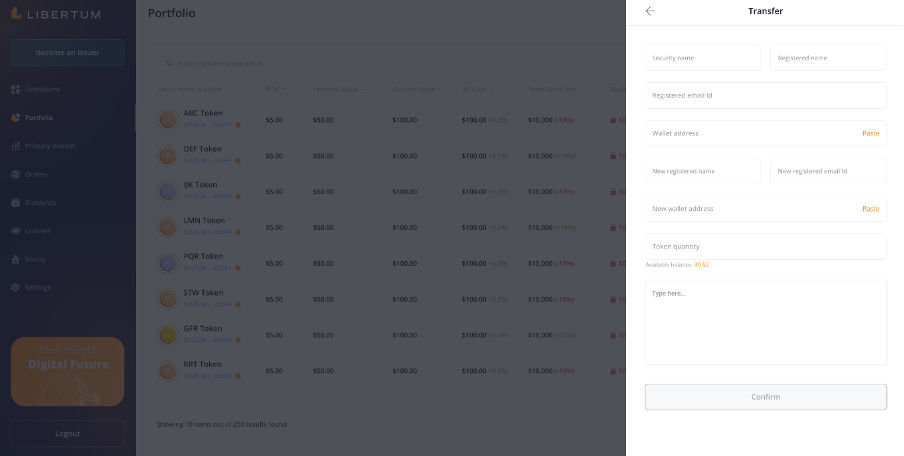
FR:095 The user must verify the prefilled information on the Transfer screen which are as follows-
● Security Name
● Registered Name
● Registered Email Address
● Wallet Address
FR:096 The user must enter the “New Registered Name”
FR:097 The user must enter the “New registered email Id”
FR:098 The user must enter the “Wallet Address”
FR:099 The user must enter the “Token Quantity” they wish to transfer to the above mentioned wallet address
FR:100 The “Available Balance” shows the number of tokens available with the user that they can transfer.
FR:101 The user must enter remarks if any in the “Enter Remarks Here…” box
FR:102 The user must click on “Confirm” once the above mentioned information is filled.
The “Confirm” button should be activated as soon as the user enters information in all the required fields.
The fields can not be empty.
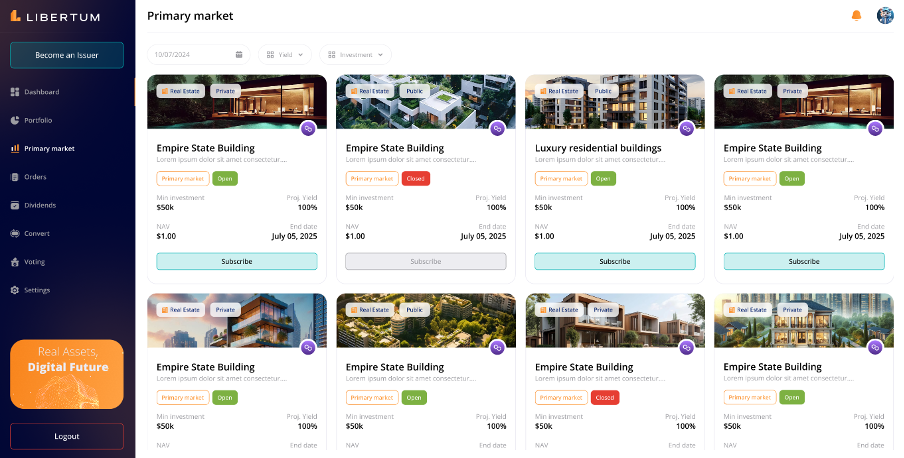
Primary Market
When the user clicks on the “Primary Market” tab from the left-hand side menu, they should be directed to a page displaying all offerings listed in the marketplace.
Each offering tile should display the following details:
● Offering Name
● Short Description
● Asset Class
\ ○ Real Estate
\ ○ Equity
● Investment Type
\ ○ Public
\ ○ Private
● Offering Status (Open, Closed, or Upcoming)
● Minimum Investment
● Projected Yield (%)
● Net Asset Value (NAV)
● End Date of the Offering
● Subscribe
Each offering tile should have a “Subscribe” button:
If the offering status is “Open,” the “Subscribe” button should be active and clickable.
If the offering status is “Closed” or “Upcoming,” the “Subscribe” button should be disabled and not clickable
FR:103 The user must click on “Yield” to select the preference of yields-
● Highest to Lowest
● Lowest to Highest
● Default
FR:104 The user must click on “Offering Tile” to access all the information about the particular listing selected by the user.
The pop-up page displays the following information -
● Overview
● About
\ ○ Website
\ ○ Sector
\ ○ Headquarters
● Documents
\ ○ Article of Association
\ ○ Certificate of Registration
\ ○ Confidential Information Memorandum
\ ○ E-Signature Document
\ ○ Operating Agreement
\ ○ Pitch Deck
\ ○ Register of Managers
\ ○ Tax Assignment Letter
● Offering Details
\ ○ Offering Name
\ ○ Start Date
\ ○ End Date
● Token Details
\ ○ Asset Name
\ ○ Token Ticker
\ ○ Token Supply
\ ○ Decimal
\ ○ Hold Time (lock up period)
\ ○ Max token holdings per investor
\ ○ Equity Configuration
\ ■ Min Investment
\ ■ Max Investment
\ ■ Launch Valuation
\ ■ Previous Valuation
\ ■ D/E Ratio
\ ○ Issuer Configuration
\ ■ Issuer Name
\ ■ Issuer Wallet Address
\ ■ Transfer Agent
After reviewing the offering details, if the user wishes to invest, they can click on the “Subscribe” button on the offering details page.
FR:105 The user must click on the “Subscribe” button to subscribe for a particular listing.
If the user’s wallet is connected and active:
● The subscription request will be sent to the issuer for whitelist approval.
If the user’s wallet is not connected or inactive:
● The user will be prompted to connect their wallet before proceeding with the subscription.
● The user will be redirected to the wallet connection section to complete this process.
When the subscription request is approved and the wallet address is confirmed on-chain, the “Subscribe” button should automatically change to the “Invest” button.
The investor is then redirected to the Create Order page and do the following-
FR:106 The investor must enter the capital amount they wish to commit for the offering in the “Committed Capital (USD)” field.
FR:107 The investor must enter the Quantity they wish to create an order for in the “Quantity” field.
FR:108 The investor must check
FR:109 The investor must “tick” the checkboxes’ available above the “Save & Proceed” button before proceeding further.
Once the investor has successfully moved to the next step by clicking the “Save & Proceed” button, they will be redirected to the next step i.e., Sign & Create.
FR:110 The investor must click on the “Sign” button to open the “Purchase Agreement” where they are supposed to sign the document.
FR:111 The investor must click on the “Previous” button to go back to the previous page.
FR:112 The investor must click on the “Save & Proceed” to move to the next step.
The button will be enabled post the investor has successfully signed the Purchase Agreement.
On clicking on the “Save & Proceed” the investor will be redirected to a pop-up modal where they will see the Preview of the order created displaying the following information -
● Pay with
● Fee
● Total
FR:113 The investor must click on the “Invest” button to confirm and proceed further.

Once the investor clicks on the “Invest” button a pop-up will appear confirming that the order has been completed successfully.
FR:114 The investor must click on “Done” to close the Pop-up modal and will be redirected to the Orders tab to view all the orders including the one just created.
The escrow account confirms receipt of payment to the issuer.
When the issuer views the request and clicks “Mint,” the tokens are minted to the investor’s whitelisted wallet address.
The escrow account simultaneously distributes the payment to the issuer’s address and the fee account.
If the issuer rejects the mint request, the escrow account initiates a refund to the user’s wallet address.
Orders
The “Order” section lets investors track the details of all orders that they have placed.
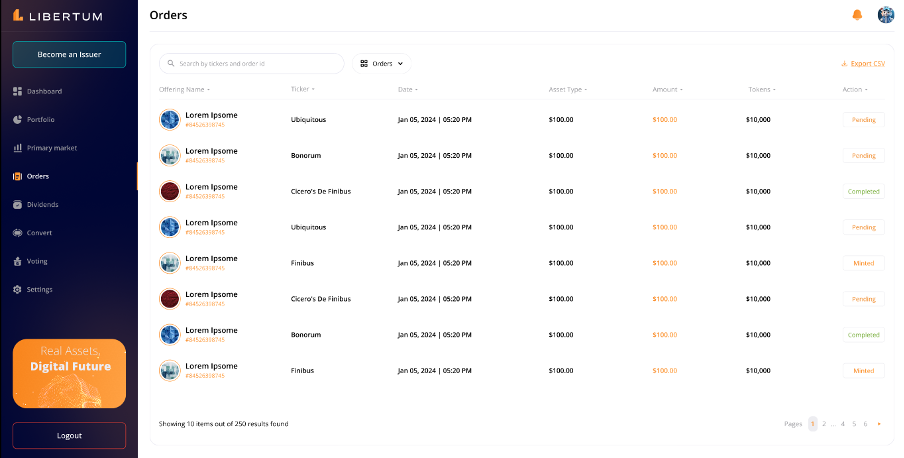
On the “Orders” page, the user will be able to view the following details for each order:
● Offering Name & Order ID
● Ticker
● Date
● Asset Type
● Amount
● Tokens Bought
● Status
\ ○ Pending
\ ○ Rejected
\ ○ Completed
\ ○ Minted
FR: 115 The investor must click on the “Pending” or “Completed” status, they will be able to view the detailed status of the current order, including:
● Subscription Date & Time
● Wallet Whitelisted Date & Time
● Order Created Date & Time
● Payment Received Date & Time
● Minted Date & Time
FR:116 The user must click on the “Search bar” to search for a particular offering by entering the offering’s name.
FR:117 The user must click on “Orders” in case they wish to search the offering from the categories i.e.,Orders or Convert. The user can select the “Orders” basis of their preference.
FR:118 The user must click on “Export CSV” to download the CSV file of the orders placed by the investor for record keeping and further analysis.
Dividends
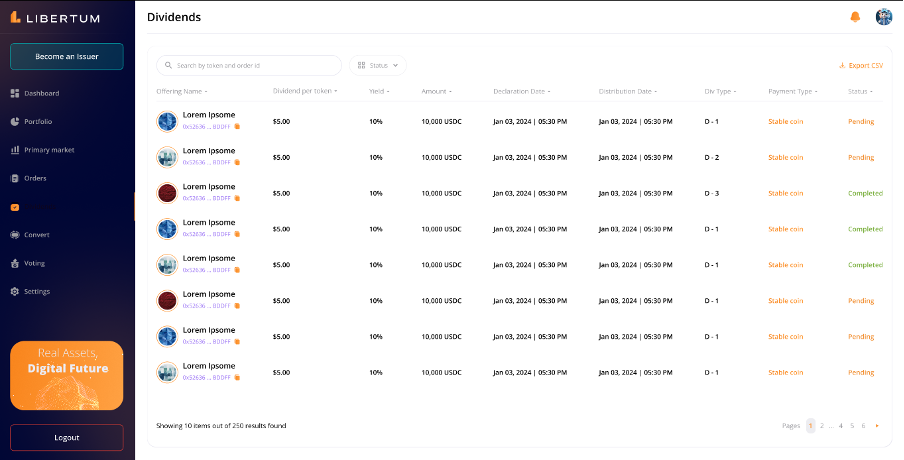
“Dividends” section lists all the dividends received by an individual against various offering that they hold, displaying following informations:
● Offering Name:
● Dividend per token:
● Yield
● Amount
● Declaration Date
● Distribution Date
● NAV Price
● Payment Type
● Status
● Page Display - Depicting the number of pages utilized to display the complete data
FR:119 The user must click on the “Search bar” to search for a fund by entering the fund’s name.
FR:120 The user must click on “Status” in case they wish to search the offering from the status category i.e.,All, Pending and Complete. The user can select the “Status” basis of their preference.
FR:121 The user must click on “Export CSV” to download the dividend list in CSV format for offline record keeping and further analysis.
Convert
The “Convert” section enables the investors to convert the tokens from the ERC-3643 standard to the wrapped ERC-20 standard, so that they can easily trade the ERC-20 tokens on centralized (CEX) or decentralized exchanges (DEX).
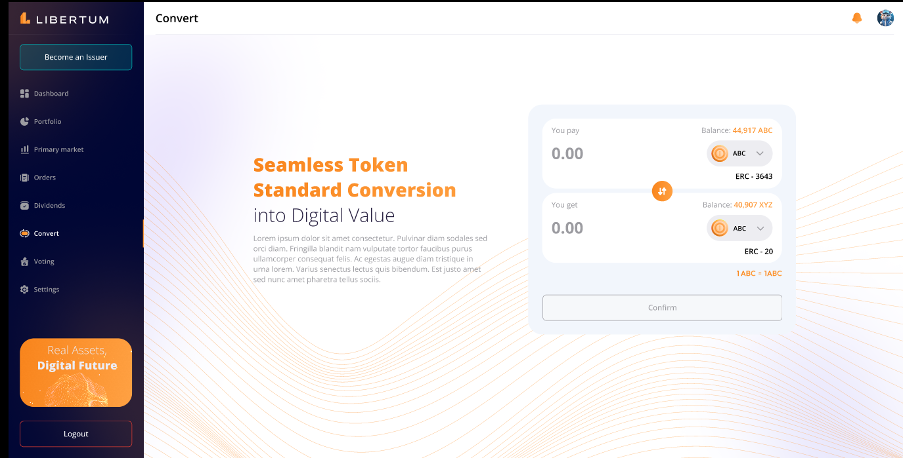
On the Convert page, the user will be able to convert their ERC-3643 tokens to wrapped ERC-20 tokens at a 1:1 ratio.
The user will first need to connect their wallet to the platform.
Once the wallet is connected:
● The user will select the token they wish to convert from a dropdown menu.
● The user will input the number of ERC-3643 tokens they want to convert.
● The corresponding number of wrapped ERC-20 tokens to be received will be automatically calculated and displayed.
● The platform fee, charged in ETH, will also be displayed.
FR:122 The investor must click select the token from the drop down list in both the “You Pay” and “You get” enter panels.
FR:123 The investor must also enter the number of ERC-3643 tokens they want to convert.
After the user inputs the required details, the “Confirm” button will be enabled.
FR:124 The investor must click on the “Confirm” button. Upon clicking “Confirm,” a confirmation modal will appear.
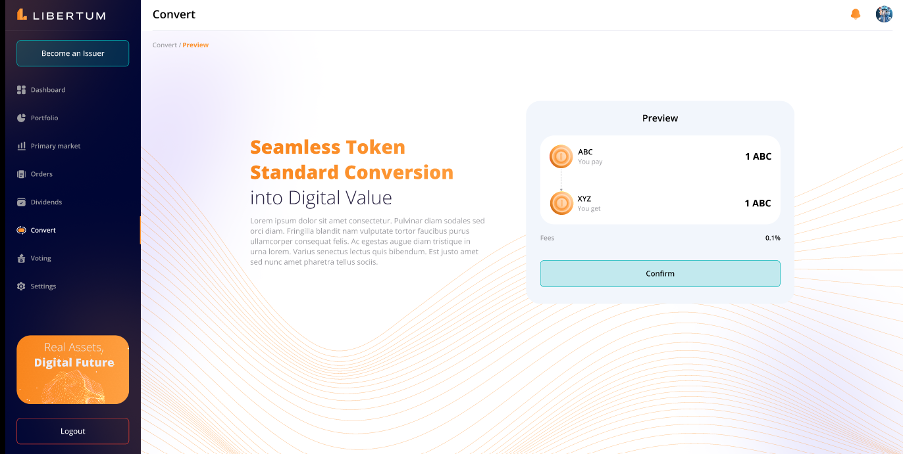
FR:125 The investor must click on the “Confirm” button to give final confirmation after the preview of the information.
After final confirmation, the ERC-3643 tokens will be locked in the contract, and the corresponding wrapped ERC-20 tokens will be issued to the user.
The newly converted ERC-20 tokens will then be available for trading on supported CEX or DEX platforms.
Once the tokens are converted to the ERC-20 standard:
● The cap table will be updated to reflect the change.
● The converted tokens will no longer carry dividend rights, and the investor will forfeit any associated governance or profit-sharing privileges tied to ERC-3643 tokens.
If the user wishes to convert the ERC-20 tokens back to the ERC-3643 standard:
● The user will need to return to the Valuit platform.
● They must undergo KYC/KYB verification and wallet whitelisting.
● Only after these steps will the user be allowed to reconvert their ERC-20 tokens to ERC-3643 tokens.
Voting
The “Voting” section enables the investors to participate in decision-making processes for the offerings they have invested in.
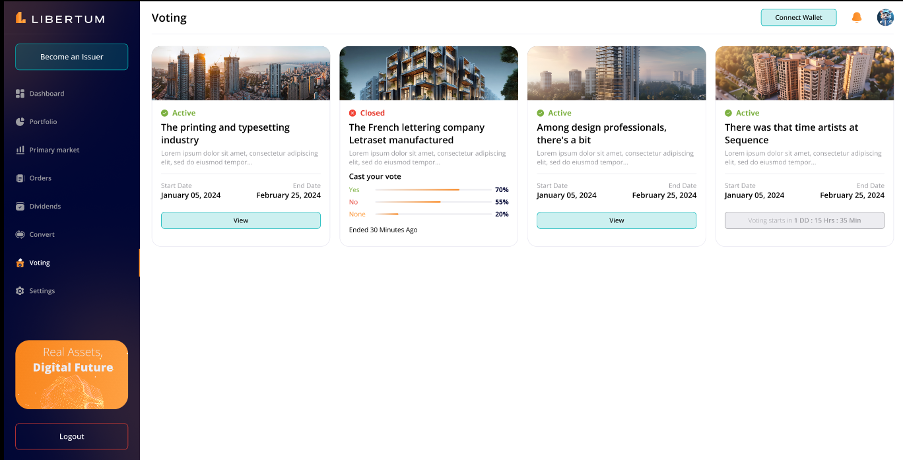
The proposals will be listed with a status of “Upcoming,” “Active,” or “Closed,” based on their start date.
Upcoming: The proposal will display a countdown timer showing the time remaining until voting starts (e.g., “Voting starts in 1 day, 12 hrs, 35 mins”).
Active: Investors can cast their votes, with each token representing one vote.
Closed: Voting results will be displayed, showing the percentage of votes for each option (Yes, No, None), along with details such as voter addresses, voting types, and voting power percentages.
FR:125 The investor must click on the “View” button to view proposals related to the offerings they are invested in. The Investors can click on a proposal to view detailed information, including:
● Proposal Cover Image
● Proposal Description
● Status-Specific Details:
\ ○ Upcoming Proposals: Display a countdown timer until voting begins.
\ ○ Active Proposals: Show voting options (Yes, No) for investors to cast their votes.
\ ○ Closed Proposals: Display the voting results, including percentages, voter details, and voting power.
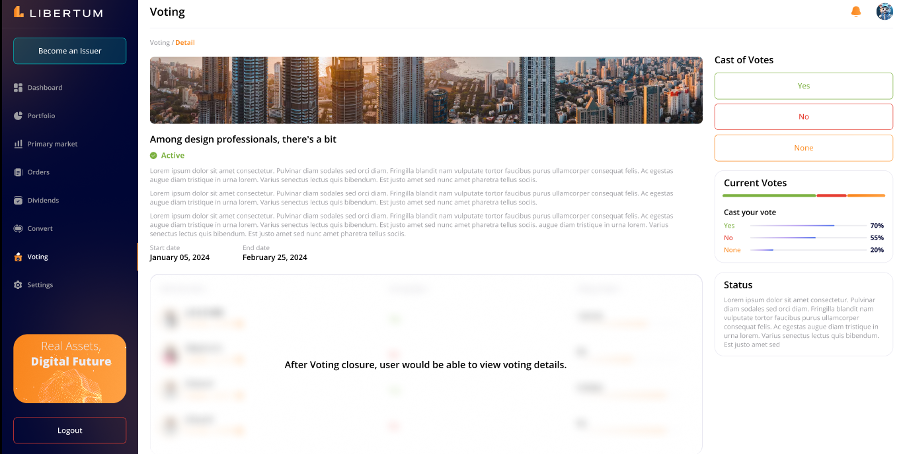
FR:126 The investor must click on “Yes”, “No”, or “None” basis at their discretion.
If the proposal is in the “Active” state, the Investor can vote based on the number of tokens they hold.
The voting power of the Investor will be calculated based on their token holdings, using the formula.
Voting Power Percentage = (Investor’s Tokens / Total Voting Tokens) * 100
The Investor’s voting impact will be proportional to their token holdings.
Settings
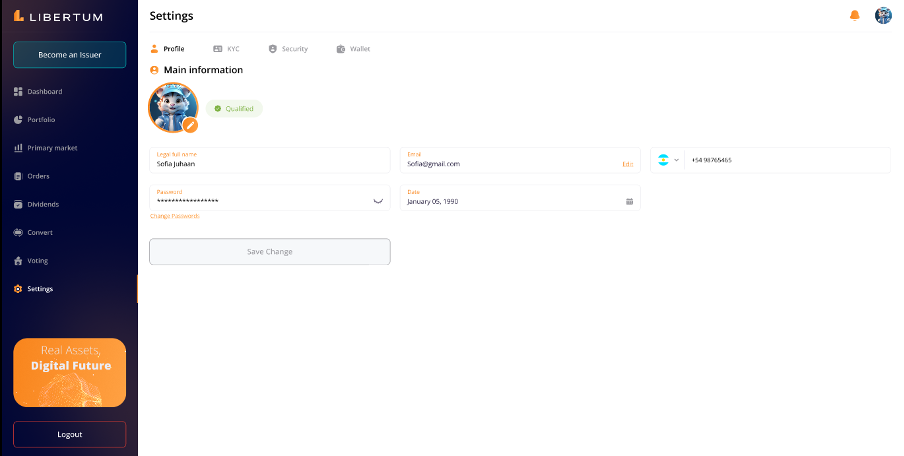
“Settings” section manages all the setting functionalities under various categories available with the user.
● Profile
● KYC
● Security
● Wallet
FR:127 The user must click on the “Edit Icon” next to the name initial display to add or change the profile picture.
FR:128 The verified ticker next to the profile picture of a user depicts the KYC status.
FR:129 The user must click on “Change Password” if they wish to change the password of their Libertum Platform. On clicking the “Change Password” a pop-up screen will appear which will direct them to enter the old password, new password, confirm the new password and then click on “Save” to change the password successfully.
FR:130 The user must click on “Save Changes” to ensure all the changes are saved before they close the Profile Tab.
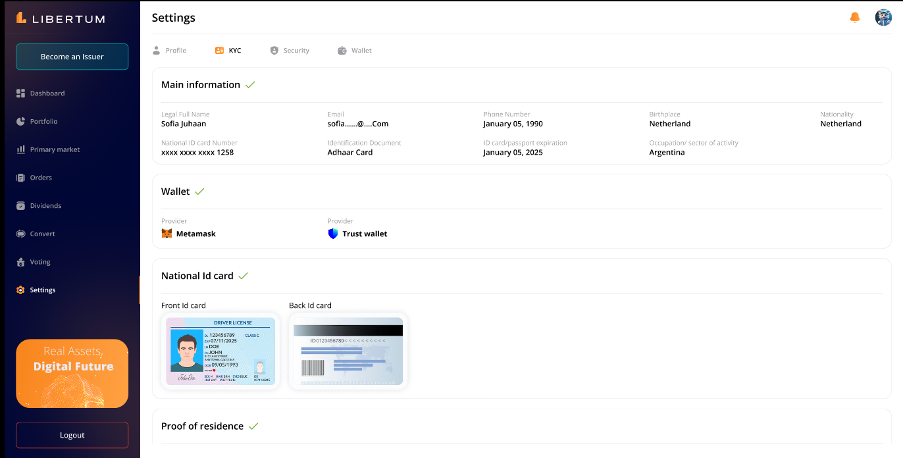
“KYC” section under the Settings tab manages all the KYC related functionalities of the user.
This section is non editable and only allow users to view the information/details submitted by them at the time of KYC to Sumsub, which are as follows-
● Main Information
\ ○ Full Name
\ ○ Email ID
\ ○ Mobile No.
\ ○ Date of Birth
\ ○ Identification Document
\ ○ ID Card/ Passport Expiration
\ ○ Occupation/ Sector of Activity
\ ○ Nationality/ Birthplace
\ ○ National ID Card Number
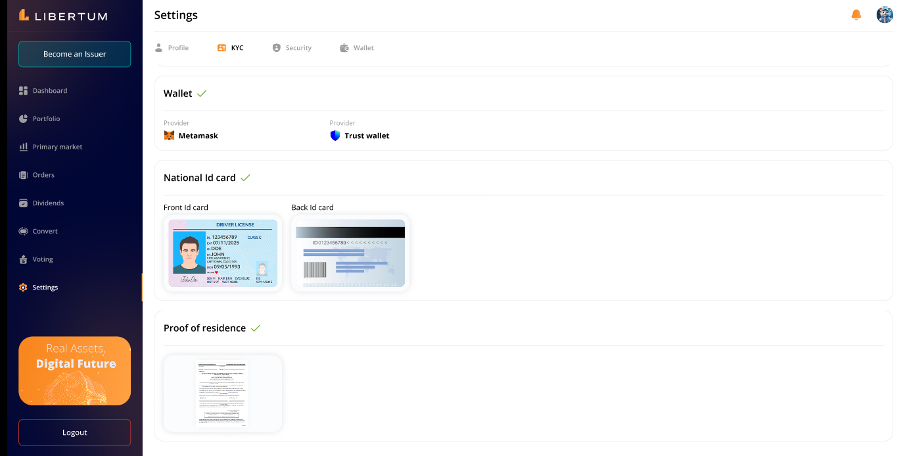
● Wallet Information
\ ○ Provider
\ ○ Date
\ ○ Address
● Nation ID Card - Front & Back picture
● Proof of Residence - Picture of Proof of Residence
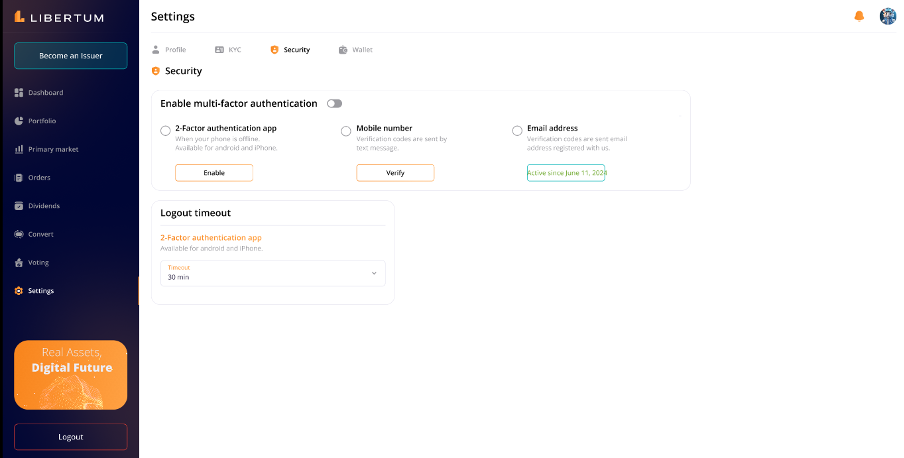
“Security” section under the Settings tab manages all the security related functionalities of the user.
FR:131 The user must click on the “Enable” button or “Disable” button to enable or disable the 2FA through the google authenticator application.
FR:132 The user must click on “Verify” button if they wish to verify the Mobile number
FR:133 The “Verified” signals that the selected mode of security has been verified.
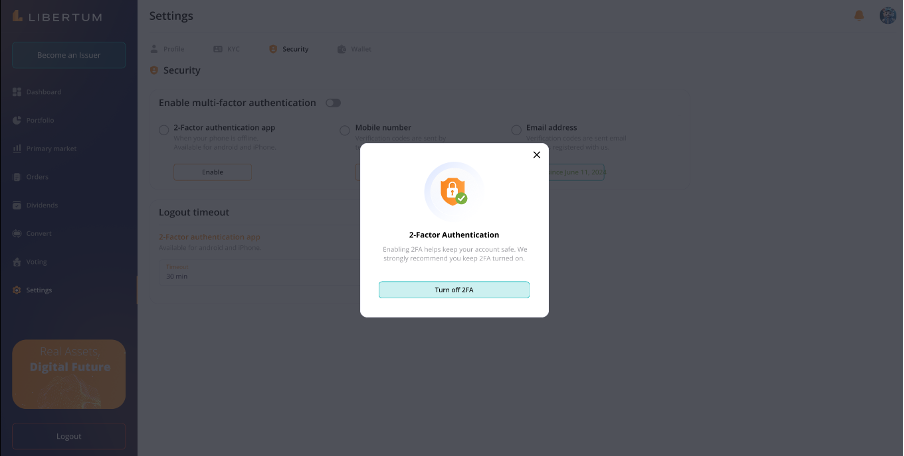
“Wallet” section under the Settings tab manages all the wallet related functionalities of the user.